13 August 2026
Cymbal Care and Cleaning: Keep Your Tone and Shine
Cymbal Care and Cleaning: Keep Your Tone and Shine
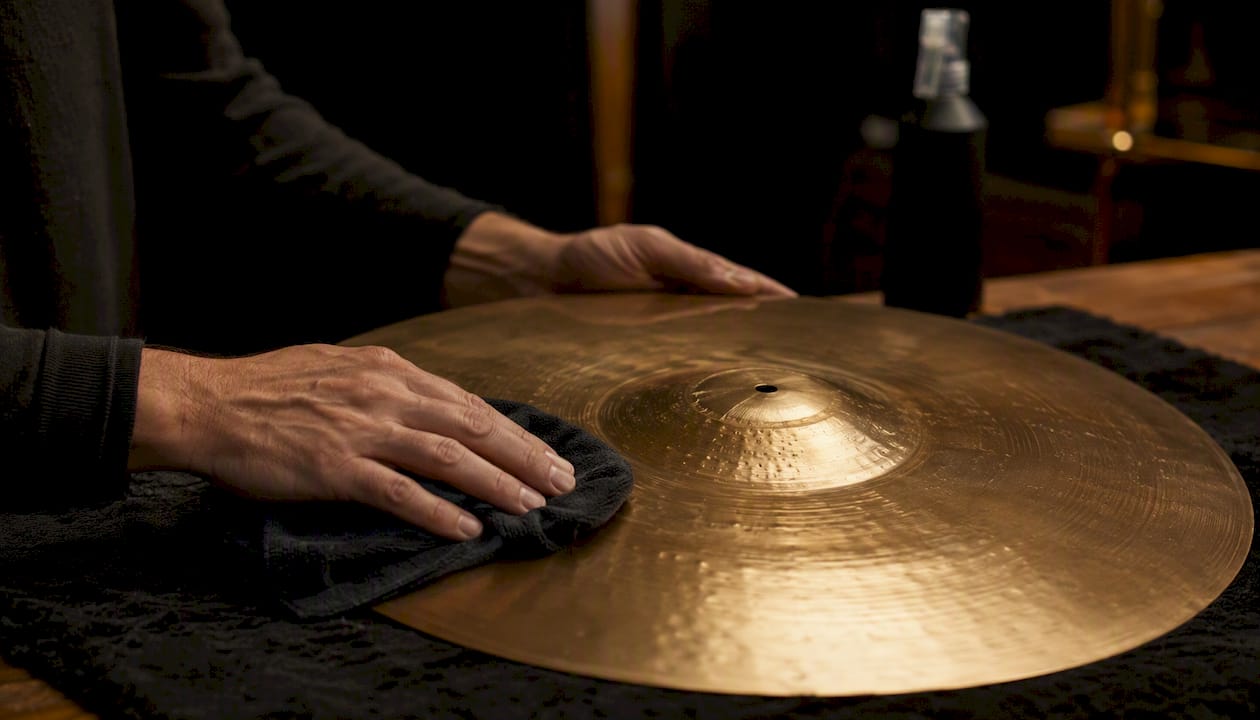
Clean cymbals correctly and you preserve both their tone and their lifespan. The single safest default method is warm soapy water on a microfiber cloth, wiped along the grooves, rinsed lightly, and dried immediately. That works for almost every finish. What changes by finish is whether you can go further, specifically whether polish is safe or whether you should stop at soap and water.
Right after a gig or practice session:
- Wipe down every cymbal with a dry microfiber cloth to remove sweat, oils, and stick residue
- Handle by the edges or wear cotton gloves to avoid transferring fingerprints
- Never use Brasso, steel wool, household metal polish, or WD-40 on any cymbal
- Store flat or in padded sleeves, never stacked bare against each other
Key Takeaways
Cymbal care and cleaning starts with identifying your finish: brilliant cymbals tolerate polish, traditional finishes do not, and every other decision follows from that single distinction.
| Point | Details |
|---|---|
| Finish determines method | Brilliant finishes tolerate polish; traditional and raw finishes should get soap and water only. |
| Dry wipe after every session | Removing sweat and oils immediately after playing is the single most effective oxidation prevention habit. |
| Soap and water is the safe default | Warm soapy water on a microfiber cloth, wiped along grooves and dried immediately, works for most cymbals. |
| Household hacks carry real risks | Lemon, vinegar, and toothpaste can remove tarnish but risk logo loss and uneven results on any finish. |
| Patina can be worth keeping | Cleaning restores high frequencies, but a developed patina adds warmth that suits jazz, blues, and vintage tones. |
Table of Contents
- How to identify your cymbal finish before you clean anything
- What tools and supplies you need before you start
- Cymbal care and cleaning: the safe step-by-step method
- When and how to use cymbal polish safely
- Tough tarnish: household hacks and their real trade-offs
- How dedicated cymbal cleaners compare
- How to clean without losing your cymbal’s logo
- What not to use and the mistakes that cause real damage
- Routine maintenance and storage that reduces cleaning needs
- When to leave the patina alone
- Expert tips from Templeofsound on transport, inspection, and when to call a pro
- The finish-first rule is the only rule that actually matters
- Sources
How to identify your cymbal finish before you clean anything
Your finish determines your entire cleaning approach, so getting this right first saves you from an expensive mistake.
Brilliant finish cymbals have a mirror-like, highly reflective surface. Run your finger across the bow: it feels smooth and glassy. Zildjian’s A Custom series, Sabian’s AAX, and Paiste’s Signature Reflector line all use brilliant finishes. These cymbals typically receive a factory protective coating at the manufacturer, but that coating wears off over time through playing and handling. Once it’s gone, oils and sweat oxidize the bronze directly, dulling the high frequencies you paid for.
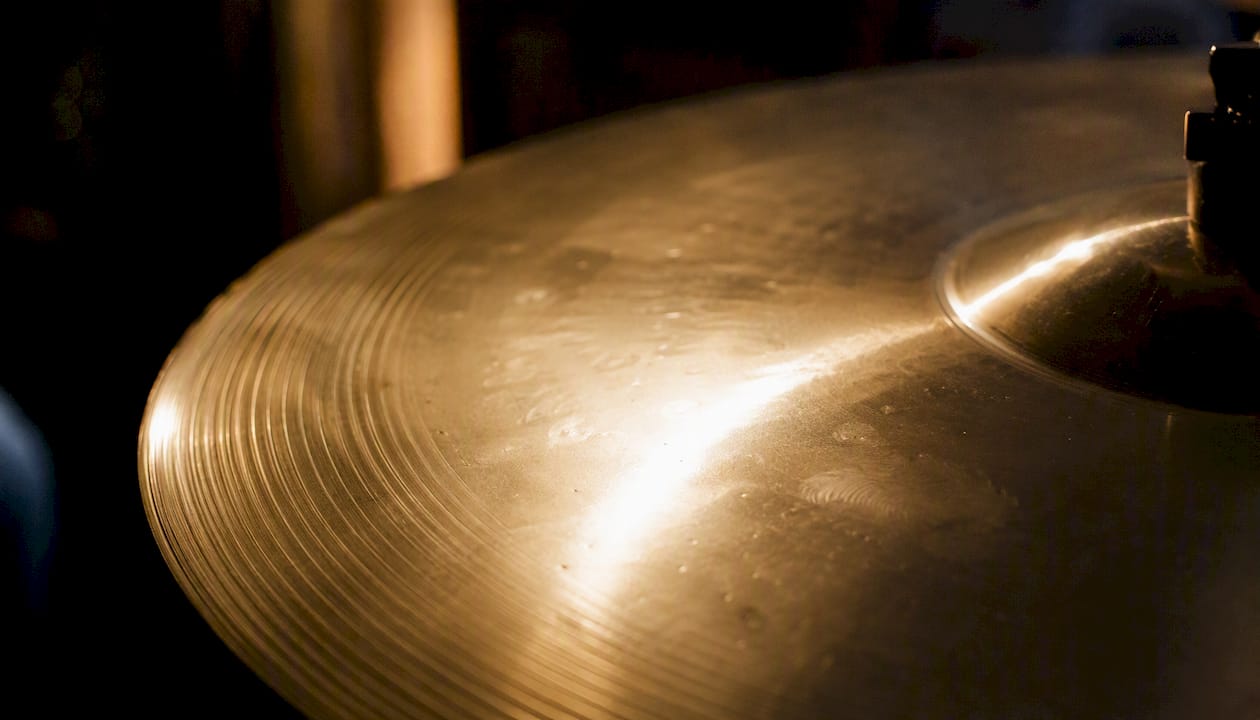
Traditional (raw/lathed) finish cymbals look darker and more matte. You can see and feel the lathe grooves clearly. Zildjian’s K series, Sabian’s HH, and Paiste’s Traditional line fall here. These finishes have no protective coating and are not designed for polish. Applying cymbal polish to a traditional finish risks stripping the natural patina that gives these cymbals their character and warmth.
Color-coated or specialty finishes (think Sabian’s Artisan or certain limited editions) need the most caution. Treat them like traditional finishes at minimum, and check the manufacturer’s care page before doing anything beyond a dry wipe.
Logo risk varies by finish too. Printed ink logos sit on top of the metal and come off with any solvent or abrasive. Stamped or engraved logos are permanent. Know which yours is before you open a bottle of anything.
What tools and supplies you need before you start
Gather everything before the cymbal comes off the stand. Scrambling mid-clean with wet hands leads to shortcuts that cause damage.
Core kit:
- Two or three microfiber cloths (one for cleaning, one for drying, one for buffing)
- Mild dish soap (Dawn or similar, unscented and non-degreaser formula)
- Warm water in a bowl or spray bottle
- Soft-bristled toothbrush for groove detail work
- Nitrile or cotton gloves
- Soft towel or foam mat to lay the cymbal on
Optional additions:
- Dedicated cymbal cleaner (Music Nomad Cymbal Cleaner or Vater Cymbal Cleaner are widely used options)
- Cymbal polish for brilliant finishes only
- Painter’s tape or small cloth shields for logo protection
- Cymbal protector spray for post-clean oxidation prevention
For transport and storage:
- Individual cymbal sleeves (fabric or neoprene)
- Padded cymbal bag or hard case with dividers
- Felts and sleeves for all stand contact points
Pro Tip: Pack a small zip-lock bag in your stick bag with two microfiber cloths and a pair of cotton gloves. A 30-second post-set wipe takes almost nothing out of your breakdown routine and dramatically slows oxidation between deep cleans.
Cymbal care and cleaning: the safe step-by-step method
This process works for brilliant and traditional finishes alike. For traditional finishes, stop after step 4 and skip any polish entirely.
- Remove the cymbal from the stand and lay it flat on a soft towel or foam mat. Never clean a cymbal while it’s mounted; the stand contact point can scratch the underside.
- Dry wipe first. Use a clean microfiber cloth to remove loose dust, stick residue, and surface grime. Work in circular motions following the lathe grooves, not across them.
- Mix your cleaning solution. A few drops of mild dish soap in a bowl of warm (not hot) water. Dip your cloth, wring it nearly dry, and apply with light pressure along the grooves.
- Use the toothbrush for grooves. Dip it in the soapy water and gently work along the lathing lines where grime collects. Keep strokes directional, never scrubbing across the grooves.
- Rinse lightly. Dampen a fresh cloth with clean water and wipe off all soap residue. Do not submerge the cymbal or run it under a tap for extended periods.
- Dry immediately and thoroughly. This step matters more than most drummers realize. Leaving moisture on bronze causes spotting and accelerates oxidation. Use a dry microfiber cloth, then let the cymbal air-dry for a few minutes before storage.
- Visual check. Hold the cymbal up to a light source and look across the surface at a low angle. Remaining grime shows up clearly. If spots remain, repeat steps 3 through 6 rather than pressing harder.
Never use high-temperature water. Heat can stress the bronze and affect how the cymbal vibrates. Never scrub across the grooves with anything abrasive, even a cloth under heavy pressure.
When and how to use cymbal polish safely
Polish is for brilliant finishes only. Applying it to a traditional or raw finish removes the natural oxidation that defines the cymbal’s tone, and you cannot put that patina back.
Before you open the polish:
- Confirm your finish is brilliant (mirror-like, smooth to the touch)
- Check whether your cymbal still has its factory coating. If it does, soap and water is enough; polish on a coated surface can lift the coating unevenly
- Identify all printed logos and plan to avoid them entirely
Application technique:
- Apply a small amount of polish to your cloth, not directly to the cymbal
- Work in short strokes following the lathe grooves from the bell outward
- Keep a clean cloth over any printed logo areas while you work nearby
- Buff with a separate dry cloth using the same directional strokes
- If the polish requires rinsing (check the label), rinse and dry immediately
How often? For a gigging drummer, polishing once every few months is plenty. Polish too frequently and you risk altering the cymbal’s tone by removing microscopic layers of metal over time. For a collector or studio player who wants to preserve a specific sound, polishing once or twice a year is more appropriate.
Pro Tip: Before using any polish on a cymbal you care about, test it on a small area near the edge on the underside. Wait five minutes, wipe off, and check for discoloration or finish change. This 10-second test has saved more than a few irreplaceable cymbals.
Many drummers also find that a well-maintained brilliant cymbal cleaned regularly with soap and water never needs polish at all. The polish is for restoration, not routine upkeep.
Tough tarnish: household hacks and their real trade-offs
When tarnish is heavy and you don’t have a dedicated cleaner on hand, household methods can help. They’re not as effective as purpose-made products, but they’re not useless either. Common household cleaners like lemon, vinegar, ketchup, and toothpaste can remove grime, but each carries specific trade-offs you should know before you start.
| Method | How it works | Effectiveness | Logo risk | Abrasiveness | Notes |
|---|---|---|---|---|---|
| Lemon juice | Mild acid dissolves oxidation | Moderate | High | Low | Rinse fast; acid continues working |
| White vinegar | Mild acid, similar to lemon | Moderate | High | Low | Strong smell; dilute before use |
| Ketchup | Acetic acid + mild abrasive | Low to moderate | Medium | Low | Messy; works slowly on light tarnish |
| Toothpaste (non-gel) | Mild abrasive + surfactant | Moderate | High | Medium | Avoid whitening formulas; can scratch |
| Baking soda paste | Mild abrasive | Low | Medium | Medium | Rinse thoroughly; residue in grooves |
The acid-based methods (lemon, vinegar) work by chemically reacting with the copper oxide on the cymbal’s surface. They’re effective on light to moderate tarnish but will lift printed logos quickly if you’re not careful. Always dilute, apply with a cloth rather than pouring directly, and rinse within two minutes.
Toothpaste is the riskiest of the group for finish integrity. Non-gel white toothpaste contains mild abrasives that can scratch a brilliant finish if applied with any pressure. On a traditional finish, it can remove patina unevenly.
Pro Tip: If you’re using a household acid method, tape over printed logos with painter’s tape before you start. It takes 30 seconds and prevents a mistake you can’t undo.
When household methods are acceptable: light tarnish on a traditional finish where you’re not worried about the patina, or a quick clean on a budget practice cymbal. When to stop and use a dedicated product: heavy tarnish on a gigging or studio cymbal, any brilliant-finish cymbal you care about, or any cymbal with printed logos you want to preserve.

How dedicated cymbal cleaners compare
Independent shootout testing confirms that dedicated cymbal cleaners outperform DIY household solutions for heavy tarnish, though household methods can help in a pinch. The key difference is consistency: purpose-made cleaners are formulated for bronze alloys and produce more uniform results with less effort.
| Product type | Best for | Tarnish effectiveness | Logo risk | Abrasiveness | Ease of use |
|---|---|---|---|---|---|
| Dedicated cymbal polish | Brilliant finishes | High | High if overused | Low to medium | Moderate (requires buffing) |
| All-purpose cymbal cleaner | Both finish types | Medium to high | Medium | Low | High (spray and wipe) |
| Light protector/wax | Post-clean maintenance | Low (not for tarnish) | Low | None | Very high |
Practical recommendations:
- Stage cymbals that take heavy stick abuse: an all-purpose cymbal cleaner like Music Nomad Cymbal Cleaner handles regular buildup without the abrasion risk of a polish
- Studio cymbals where tone consistency matters: clean with soap and water, then apply a light protector to slow re-oxidation between sessions
- Collector or vintage cymbals: soap and water only, no polish, no dedicated cleaner unless you’ve tested it on a spare area first
Brands like Zildjian, Sabian, and Paiste each publish care guidance for their specific lines. Always cross-reference a product’s instructions with the manufacturer’s recommendations for your cymbal. Testing on a small area and following the lathing direction reduces abrasion risk regardless of which product you choose.
Paiste specifically advises against mechanical buffing tools for any finish. The heat generated by power buffers can alter the cymbal’s sound or remove metal unevenly, and no cleaner result is worth that risk.
How to clean without losing your cymbal’s logo
Printed logos are the first casualty of aggressive cleaning. The ink sits on top of the metal with no protective layer, and any solvent, acid, or abrasive that touches it will start lifting it immediately.
Why logos come off: Most printed cymbal logos use a screen-printing process. The ink bonds to the metal surface but has no topcoat. Solvents dissolve the binder; acids attack the ink pigment; abrasives physically remove it. Even some mild cleaners will fade a logo over repeated applications.
Protection during cleaning:
- Apply polish or cleaner to your cloth, never directly to the cymbal surface
- Place a small folded cloth over the logo before working nearby
- Use painter’s tape as a mask for deep-cleaning sessions; remove it slowly after drying
- Work your strokes away from the logo, not toward it
Pro Tip: Photograph your cymbals before any deep-clean session, including close-ups of the logos. This takes two minutes and gives you a reference for insurance, resale valuation, or simply knowing what you started with.
If a logo is already faded, there’s no reliable way to restore it at home. Some drummers accept logo loss as a trade-off for a cleaner, brighter-sounding cymbal. That’s a legitimate choice, but make it deliberately rather than by accident.
What not to use and the mistakes that cause real damage
Some of these will surprise you. Others you’ve probably heard before but may be ignoring.
Banned cleaners and tools:
- Brasso and household metal polishes contain abrasives designed for harder metals. On bronze, they remove material aggressively and can permanently alter the surface texture and tone
- Steel wool of any grade. Even 0000-grade steel wool leaves micro-scratches that accelerate oxidation
- WD-40 is a water-displacement lubricant, not a cleaner. It leaves an oily residue that attracts grime and is nearly impossible to remove completely from grooves
- Concentrated citrus degreasers are too acidic for extended contact with bronze
- Mechanical buffing tools (drills with polishing attachments, bench polishers) generate heat that can change how the cymbal vibrates
Mounting mistakes:
- Over-tightening wing nuts is the leading cause of keyholing, where the cymbal’s center hole elongates from metal-on-metal stress. The wing nut should be finger-tight only, with a felt washer above and below the cymbal
- Missing felts or sleeves on the stand rod allow metal-to-metal contact, which causes both keyholing and edge chipping over time
- Letting the cymbal rest directly on a metal stand cup without a felt pad concentrates stress at a single point
Handling mistakes:
- Dropping a cymbal on a hard floor, even from a low height, can cause edge cracks that propagate under playing stress
- Standing a cymbal on its edge on a hard surface risks warping, particularly in warm environments
- Gripping the cymbal by the bell during cleaning concentrates pressure at the thinnest point
Small keyhole cracks rarely stay small. Once the metal around the center hole starts to crack, vibration from playing accelerates the damage. Catch it early by inspecting the center hole at every cleaning session.
Routine maintenance and storage that reduces cleaning needs
The less grime that builds up, the less aggressive your cleaning needs to be. A simple routine keeps your cymbals in good shape between deep cleans.
Daily and post-session habits:
- Wipe every cymbal with a dry microfiber cloth immediately after playing; sweat and oils are the primary drivers of oxidation, and removing them within minutes of playing makes a measurable difference
- Handle by the edges or use cotton gloves when mounting and dismounting
- Check felts and sleeves for wear every time you set up; a compressed felt is no longer protecting the cymbal
Storage:
- Store cymbals individually in fabric or neoprene sleeves, never stacked bare
- Use a padded cymbal bag with individual dividers for transport; hard cases offer better protection for touring
- Keep stored cymbals away from humidity extremes; a climate-controlled room is ideal, but avoiding damp basements and hot car trunks covers most of the risk
Cleaning frequency by use:
- Gigging drummer (multiple shows per week): dry wipe after every session; soap-and-water clean monthly; polish brilliant finishes every 3–4 months if needed
- Studio or rehearsal drummer (weekly use): dry wipe after every session; soap-and-water clean every 6–8 weeks
- Occasional or home player: dry wipe after playing; full clean every 3–4 months or when visible grime appears
When to leave the patina alone
Not every dirty-looking cymbal needs cleaning. For many drummers, a developed patina is the point.
Cleaning can restore some lost high frequencies on dirty cymbals, but many drummers prefer the darker, more complex sound of a developed patina for certain genres. Jazz, blues, and vintage-inspired playing often benefit from the warmth that oxidation adds. A K Zildjian that’s been gigged for years has a sound that a brand-new K simply doesn’t, and aggressive cleaning can strip that character permanently.
Visual signals that indicate grime vs. useful patina:
- Grime: sticky residue, visible stick marks, uneven discoloration concentrated near the playing zone
- Patina: even, consistent darkening across the surface, often with a slight iridescence; the cymbal feels dry and clean to the touch
Listening test: Play the cymbal and record a short clip. Clean it with soap and water only (no polish), let it dry fully, and record again. Compare the two. If the cleaned version sounds brighter and more open in a way that suits your music, cleaning was the right call. If the cleaned version sounds thinner or less complex, you may have preferred what you had.
Leave the patina when:
- You play jazz, blues, or any genre where a darker, drier sound is preferred
- The cymbal is vintage and the patina contributes to its value
- The cymbal sounds exactly how you want it to sound right now
- You’re in a studio session where the engineer specifically wants that aged character
Expert tips from Templeofsound on transport, inspection, and when to call a pro
Touring professionals treat cymbal transport as seriously as they treat the cymbals themselves. A hard case with individual foam or felt dividers is the standard for any situation where cymbals leave the building. Padded bags work for local gigs; for flights, van tours, or any situation where the gear is out of your hands, a hard case is the only safe option.
Pre-show inspection checklist:
- Check the center hole on every cymbal for signs of keyholing or hairline cracks
- Verify all felts and sleeves are present and not compressed flat
- Confirm wing nuts are finger-tight only, not cranked down
- Look at the edges for chips or cracks, particularly on crash cymbals that take direct hits
When to consult a professional repair service: Keyholing that has progressed to a visible crack, edge cracks longer than a few millimeters, or warping that affects how the cymbal sits on the stand all warrant professional assessment. Some cracks can be drilled to stop propagation; others mean the cymbal is at end of life. A repair tech can tell you which situation you’re in before the cymbal fails mid-performance.
Pro Tip: Alchemist Cymbals, distributed exclusively in the UK by Templeofsound, are handcrafted B20 bronze cymbals built to last. Proper care from day one protects that investment. You’ll find cymbal sleeves, protective accessories, and the full Alchemist range at Templeofsound.

Get everything you need to protect your cymbals. Templeofsound carries cymbal sleeves, protective accessories, and the full Alchemist Cymbals range, handcrafted B20 bronze built for drummers who take their sound seriously. Visit Templeofsound to explore the collection.
The finish-first rule is the only rule that actually matters
Most cymbal care advice collapses into one of two camps: “clean everything aggressively” or “never touch it.” Both are wrong, and both ignore the one variable that determines every other decision: your finish.
Brilliant cymbals are built to shine. They respond to polish, they reward regular cleaning, and they sound their best when the surface is clear of oxidation. Traditional and raw finishes are the opposite. Their sound lives in the patina. Cleaning a K Zildjian or a Paiste Traditional to a mirror shine isn’t maintenance; it’s subtraction.
What the conventional advice consistently underweights is the listening test. Most drummers clean by appearance and stop there. But a cymbal that looks dirty might sound exactly right for the music you’re making. And a cymbal that looks clean might have lost the frequency complexity that made it worth buying in the first place. Clean for tone, not for aesthetics.
The other thing most guides skip: transport and mounting are where cymbals actually get damaged. Keyholing from an over-tightened wing nut, edge chips from a bare stack in a gig bag, a crack that starts at the center hole and spreads over six months of playing. These aren’t cleaning failures. They’re handling failures. A clean cymbal on a badly maintained stand is still a cymbal on its way out.
Start with your finish. Clean with the lowest-risk method that solves the problem. Listen before and after. And treat the stand hardware and transport case as part of the care routine, not an afterthought.
Sources
- Cymbal Cleaning Guide - Cymbal Archive
- How to Clean Your Cymbals
- Cymbal Cleaner Shootout - zZounds Music Blog
- How to Clean Cymbals with Household Items & Pro Cleaners
- How to Polish and Clean Cymbals - Instructables