23 August 2026
A Custom Drumsticks Guide to Design, Fit, and Sound

A Custom Drumsticks Guide to Design, Fit, and Sound
Custom drumsticks give you control over five things: diameter, length, taper, tip shape and material, and the artwork on the shaft. Everything else, including the price and how long it takes to arrive, flows from those choices. If you want to start an order today, do this: pick a target diameter and length instead of a model letter, choose a wood or synthetic tip that matches your genre, select a printing method that will survive actual playing, and request a digital mock-up plus a physical sample pair before committing to a full run.
- Diameter and length control feel and reach; taper and tip control power, rebound, and cymbal tone.
- Printing method (full-color, pad, screen, or laser) determines how long your design survives.
- Weight-matched, tone-matched pairs matter for performance and recording consistency.
Most suppliers set minimum orders somewhere between one pair and a few dozen for personal use, with band or retail runs starting higher, and typical lead times running from about a week for stock specs to several weeks for a fully custom print run with sample approval built in.
Key Takeaways
Choosing custom drumsticks by measured diameter, length, and weight-matched pairs produces a more consistent, repeatable playing experience than trusting a model number alone.
| Point | Details |
|---|---|
| Choose by measurement, not model | Diameter for a labeled 5A varies between manufacturers, with notable differences that affect feel. |
| Match wood to your playing goal | Hickory balances weight and durability, maple favors speed, oak favors heavy hitters and long tours. |
| Pick a print method for durability | Full-color suits complex art, pad and screen printing hold up better on curved shafts, laser engraving lasts longest. |
| Always test a sample pair first | Run a wear test and check weight and tone matching before approving a full production run. |
| Templeofsound builds sample-first custom orders | As the UK’s exclusive London Drumstick Co. distributor, Templeofsound offers weight-matched, tone-matched custom sticks with sample approval. |
Table of Contents
- Stick Specs: Diameter, Length, Taper, Tip Shape, and Balance
- Wood and Material Choices: Hickory, Maple, Oak, and Composites
- Design Rules for Printing on a Round Surface
- Printing and Marking Methods: Which One Survives Actual Playing
- Ordering Workflow: From Mock-Up to Finished Pair
- Matching Specs to Your Playing Style or Project
- Weight and Tone Matching: What to Check Before You Commit
- Custom Grips and Coatings for Better Feel and Control
- Caring for Custom Sticks So They Last Longer
- Sustainability in Material Selection
- How Templeofsound Supports Your Custom Sticks Project
- Ready to Start Your Custom Sticks Project?
- Sources
Stick Specs: Diameter, Length, Taper, Tip Shape, and Balance
Model numbers lie to you. A “5A” from one manufacturer is not the same stick as a “5A” from another. Diameter for a labeled 5A varies between manufacturers, with notable differences that affect feel., depending on the brand, and that nearly three-hundredths-of-an-inch spread is enough to change how a stick feels in your hand. Choosing by measured diameter and length, rather than trusting a letter-and-number code, gets you a repeatable feel no matter who manufactures the blank.
Here’s how to think through the specs in order:
- Set your diameter first. Thinner sticks (around .540 to .560 inches) suit lighter touch playing, ghost notes, and jazz. Thicker sticks (.580 inches and up) hold up under heavy backbeat playing and metal.
- Set length second. Longer sticks add reach and leverage for big rim work and cross-stick technique; shorter sticks feel quicker and more controlled for tight pocket playing.
- Choose your taper. A long, gradual taper flexes more and rewards you with extra rebound, useful for buzz rolls and ghost notes. A short, abrupt taper stays stiffer and transfers more power directly into the head, which drummers who play hard rock or metal tend to prefer.
- Pick a tip shape and material. Round tips give a focused, articulate ping on cymbals. Barrel and acorn tips spread the contact area for a fuller, washier tone. Nylon tips brighten cymbal attack and resist wear; wood tips produce a warmer, darker tone but chip or crack over time.
- Confirm the balance point. A stick balanced closer to the tip feels front-heavy and powerful; one balanced toward the butt feels quick and easy to flick.
Pro Tip: Order two pairs at slightly different diameters (say, .565 inches and .580 inches) in your preferred length before committing to a full custom run. Play both on your actual kit for a week. The half-millimeter difference is more noticeable than most drummers expect.
Wood and Material Choices: Hickory, Maple, Oak, and Composites
The wood you choose changes how a stick feels before you even hit anything. Hickory is the industry default because it’s dense enough to absorb shock without transmitting every vibration into your hand, while maple runs lighter and faster and oak sits at the heavy, hard-wearing end of the spectrum.
- Hickory balances weight, flex, and shock absorption, which is why most professional and custom orders default to it.
- Maple weighs noticeably less than hickory at the same dimensions, giving you faster stick speed for technical or jazz playing, at the cost of durability.
- Oak is dense and rigid. It survives heavy hitters and long tours but transmits more shock into your wrists and forearms.
- Composite and synthetic shafts (carbon fiber or nylon-wrapped cores) resist warping and splintering almost entirely, which matters for outdoor gigs, humid climates, or drum lines that log serious mileage.
Moisture content in the raw wood matters more than most buying guides mention. Wood that’s too wet warps as it dries and throws off your weight-matched pairs; wood that’s too dry becomes brittle and cracks under normal playing. A reputable supplier specifies a moisture-content range for their blanks, generally in the single digits by percentage, and kiln-dries to that spec before turning.
For gigging or recording, nylon tips on a hickory shaft give you a durable, consistent middle ground. For merchandise runs meant for one-time use or giveaways, a composite shaft or a lower wood grade cuts cost without sacrificing playability for a casual buyer.
Design Rules for Printing on a Round Surface
A cylinder is an unforgiving canvas. Artwork that looks sharp flat on a screen often distorts, overlaps, or vanishes into the grip zone once it wraps around a 0.55-inch shaft.
- Keep the printable wrap area centered on the upper and middle shaft, away from the bottom third where your hand grips and wears the finish down fastest.
- Avoid placing logos, text, or fine detail inside the grip zone; anything there gets worn off within weeks of regular playing.
- Submit vector files (AI, EPS, or high-resolution PDF) whenever possible. Raster images need to be at least 300 DPI at final print size, or the curve will visibly pixelate.
- Stick to two or three colors and bold outlines. High-contrast designs with thick lines read clearly under stage lighting, while thin script or gradient shading muddies fast at arm’s length.
- Ask for a 360-degree digital mock-up before approving a print run, and check it from at least four rotated angles, not just the one your designer chose to show you.
Pro Tip: When you get your proof, hold it at the distance a fan in row ten would see it, not six inches from your face. If the logo disappears at that range, simplify it before you approve the run.
Printing and Marking Methods: Which One Survives Actual Playing
The printing method you choose decides how your sticks look after month three, not just out of the box.
- Full-color digital printing handles complex artwork, photos, gradients, and multi-color logos, but the ink sits on the surface and wears faster under heavy grip contact.
- Pad and screen printing work best for bold, limited-color designs and hold up well on curved surfaces, since the ink gets pressed into the wood grain rather than layered on top.
- Laser engraving burns a permanent monochrome mark directly into the wood. It never chips or fades, but it can’t reproduce color or fine gradient artwork.
A UV or lacquer topcoat over any printed design meaningfully extends its life, sealing the ink against sweat and friction, though a heavy coating can slightly change the stick’s grip texture. Laser engraving generally carries the lowest per-unit cost for large runs since there’s no ink or coating step at all, while full-color printing costs more per pair and often comes with a higher minimum order to justify the setup. For a one-off gift or personal set, pad printing with a lacquer finish gives you the best durability-to-cost ratio; for permanent branding on pro-use sticks, laser engraving is close to indestructible.
Ordering Workflow: From Mock-Up to Finished Pair
A predictable order sequence protects you from surprises when the box finally arrives.
- Lock your specs. Diameter, length, taper, wood, and tip, confirmed in writing.
- Approve a digital mock-up. Check every rotated angle and confirm colors against a printed swatch, not just your monitor.
- Request a physical sample pair. This is the step most drummers skip, and it’s the one that catches problems before you commit to fifty or five hundred pairs.
- Run a wear test on the sample. Ten to twenty strikes on a snare and a cymbal, then check print registration and any chipping around the tip. Photograph the sample in natural light and under stage lighting.
- Confirm weight and tone matching in writing if you’re ordering multiple pairs for performance or recording use.
- Sign off on the full run, and confirm packaging (bulk boxed, individually sleeved, or retail-ready for merch tables).
Pro Tip: Never skip step three, even for a rush order. A sample pair costs you a few extra days; a full run of sticks that split at the tip costs you the whole budget.
Minimum order sizes vary widely, from a single pair for personal custom orders up to dozens or hundreds for band merch and retail. Lead times run roughly a week for in-stock specs and several weeks once you add custom printing and sample approval into the timeline.
Matching Specs to Your Playing Style or Project
Model numbers won’t tell you what you actually need. Your goal will.
For recording, tip material changes cymbal character enough to matter under a microphone: wood tips read darker on tape, nylon reads brighter and more defined. Test both against your actual cymbals before locking a recording pair, and always record with a matched set so tonal consistency doesn’t drift between takes.
For tour merch, cost usually wins over longevity. A B-grade hickory blank with a simplified logo keeps unit cost down for giveaways, while your actual performance sticks stay on a premium spec. Bands selling sticks at a merch table also benefit from more printable surface area, since fans handle and inspect the design closely before buying, unlike a stick that only gets seen from the tenth row.
Run a simple A/B test on any sample pair: play a groove on your main kit, switch to the sample, then switch back. If you can’t tell them apart blind, the spec is right. If one feels noticeably different, you’ve caught a problem before it became fifty pairs of problems.
Weight and Tone Matching: What to Check Before You Commit
Weight-matching means every stick in a pair (or a batch) weighs within a tight tolerance of its partner. Tone-matching goes a step further, confirming both sticks produce the same pitch when struck the same way. Suppliers who offer weight-matched, tone-matched pairs do it specifically for performance and recording consistency, because even a small weight imbalance between your left and right stick throws off rebound symmetry in ways your hands notice before your brain does.
You can run basic checks at home without lab equipment:
- Weigh each stick on a kitchen or postal scale accurate to a gram; a noticeable gap between two sticks in the same pair is a red flag.
- Drop both sticks from the same height onto a hard floor and compare bounce height by eye.
- Strike the same cymbal with each stick using even force and listen for pitch or decay differences.
If a batch shows inconsistent weight or an odd rattle (a sign of a loose core in a composite shaft), photograph the issue and send it back to the supplier immediately rather than accepting the run. A reputable supplier replaces mismatched pairs without argument.
Custom Grips and Coatings for Better Feel and Control
Beyond wood and print, the surface texture under your fingers changes how confidently you can play for two hours straight. A raw lacquer finish gives a smooth, low-friction feel that some drummers prefer for fast technical passages, since the stick rotates easily between the fingers.
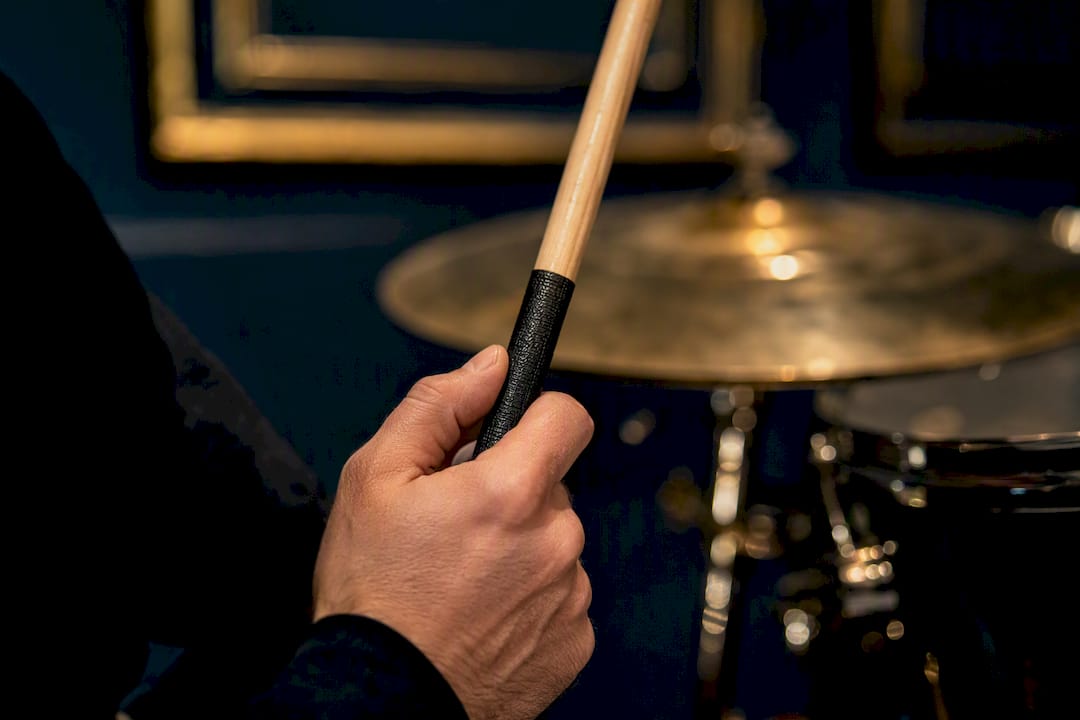
Textured or rubberized grip coatings, applied to the lower third of the shaft, solve the sweat problem that raw wood can’t. If you play under hot stage lights or in humid rooms, a grip coating keeps the stick from slipping mid-song, which matters far more than most first-time custom orders account for. Some suppliers offer a partial dip or wrap, similar to a bat grip, that adds tack without covering the full shaft in a way that would interfere with rebound.
Matte UV coatings protect printed artwork while keeping a natural wood feel, whereas gloss lacquer looks sharper on camera and at a merch table but can feel slicker in a sweaty hand. If you’re ordering for stage use, request a matte or semi-matte finish; if you’re ordering for retail display or photography, gloss reads better in product shots.
One trade-off worth knowing: heavier grip coatings add a small amount of weight to the butt end of the stick, which shifts the balance point slightly toward your hand. If you’ve dialed in a specific balance during the design process, ask your supplier whether their standard coating changes it, and request a coated sample alongside your uncoated one so you can compare both before approving the full run.
Caring for Custom Sticks So They Last Longer
Custom artwork and finishes take more care than a plain stock stick, mostly because you paid for the design and want it to survive more than a few sets.
Rotate your sticks between practice pairs and performance pairs. Sticks used only for stage work wear down far slower than ones taking daily practice-room abuse, and rotating extends the life of your printed or engraved design specifically.
Wipe sticks down after sweaty sessions with a dry cloth before storing them. Moisture trapped against a printed or lacquered surface accelerates peeling and can encourage mold on the wood itself over time. Store sticks flat rather than standing upright in a bag, since an upright stick under its own weight in a hot car or van can develop a subtle warp over weeks.
Check the tips regularly, especially nylon tips, which can crack at the base after heavy use even while the shaft looks fine. A cracked nylon tip changes your cymbal tone immediately and is one of the most common reasons a “matched” pair stops feeling matched. Retire a stick the moment you see a hairline crack anywhere along the shaft. A stick that splinters mid-song is a safety issue, not just a cosmetic one.
Sustainability in Material Selection
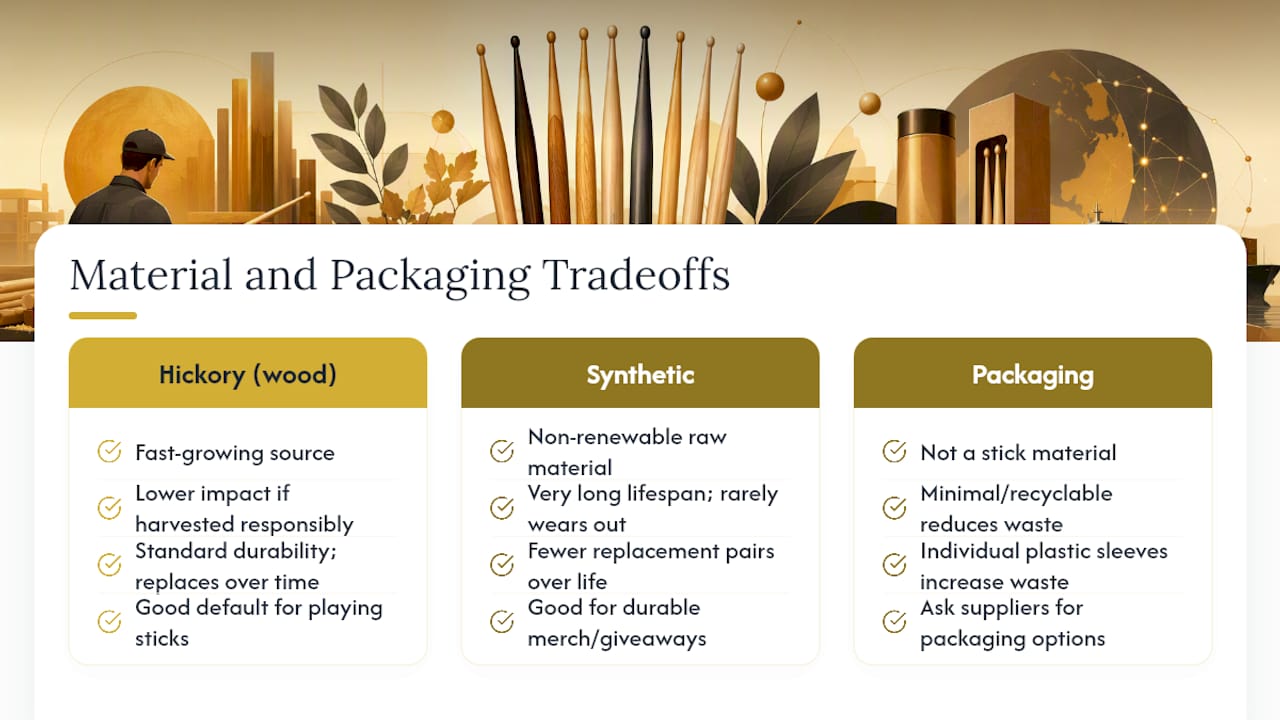
Wood sourcing matters more to serious buyers than it used to, and it’s worth asking your supplier directly rather than assuming. Hickory, the standard for most drumsticks, grows relatively fast compared to hardwoods like oak, which makes responsibly harvested hickory a lower-impact default choice than slower-growing alternatives.
Composite and synthetic shafts trade a renewable material for one that essentially never wears out, which changes the sustainability math in a different direction: fewer replacement pairs purchased over a drummer’s playing life, even if the raw material itself isn’t a tree. For merch runs where sticks are handed out as one-time giveaways, choosing a durable synthetic or a lower wood grade that still performs reasonably well reduces the number of quickly discarded pairs compared to ordering a premium wood spec nobody will actually play for long.
Packaging is the other lever within your control. Requesting minimal or recyclable packaging for a bulk order, rather than individual plastic sleeves for every pair, cuts material waste on band merch runs without touching the sticks themselves. If sustainability matters to your buying decision, ask your supplier what wood sourcing and packaging options they offer before you finalize a run, since the answer varies a lot between manufacturers.
How Templeofsound Supports Your Custom Sticks Project
Getting weight-matched, tone-matched pairs right requires a supplier who treats it as a standard offering, not an upsell. Templeofsound is the UK’s exclusive distributor for London Drumstick Co., building custom stick orders around sample approval, full-color and engraved printing, and trade accounts for retailers alongside individual drummers.
Starting a project is straightforward: bring your target diameter, length, wood, tip preference, and any artwork files you already have. Templeofsound works from those specs through a digital mock-up, then a physical sample pair, before committing to your full run, the same sequence outlined earlier in this guide. That sequence exists precisely because skipping it is where most custom orders go wrong.
— Will
Ready to Start Your Custom Sticks Project?
Most custom drumstick sellers hand you a template, take your logo, and ship whatever comes off the line. Templeofsound does the opposite: you get a sample pair in your hands, weight-matched and tone-matched, before a single full run gets approved. That’s the real difference for a drummer who’s been burned before by mismatched pairs or artwork that wore off in a month.

Whether you’re outfitting your own kit with a personal spec or ordering a full merch run for a tour, the process starts the same way: target diameter and length, wood and tip choice, and a printing method that matches your budget and durability needs. Templeofsound’s custom stick builder walks you through those decisions and puts a sample pair in your hands before you commit to the full order. If you’re ready to lock in your specs, start there and request your mock-up today.
Sources
- Drum set stick recommendations
- The Different Types Of Drumsticks (And The Best To Buy)
- The Ultimate Guide to Custom Drumsticks